


For Mason's party we had a tiger theme since Mason was born in the year of the tiger. I've been collecting ideas since I pregnant, and had fun putting together the invitations, favors and party decoration.
 Since I couldn't really find the card I've been imagining I decided to create my own. It's still not what I really really wanted, but I was able to get my tiger in a cracked egg theme on there. I used Illustrator to create the overall invitation. To create the lil tiger in a red egg, I found the tiger graphic from the ones included in the office program, and the cracked egg I had to create in Illustrator. It took me hours to do this since I'm such a newb to Illustrator and Photoshop, which is why I kept this very simple.
For the favors, I had put my request in to my aunt in Japan to see if she can find mini kokeshi boy dolls that were inexpensive. Instead she found me these. I forgot what these are called in Japanese but they wobble if you push them, which also has a nice meaning. Something like you'll always get up if you're ever pushed down. If I find the actual meaning/saying I'll repost this. I put these into a clear 2x2 box, added some red shreds for a little color, slapped on a favor tag and tied a ribbon on it. I got all the packaging supplies from Michael's, although I did have a heck of a time finding the clear 2x2 square favor boxes.


 I stumbled across these clear plastic with tin containers at Michaels and thought these would make a great centerpiece. They had ones that were all clear, but the ones with the patterns were on clearance. These also comes with a lid, which I didn't need for my purposes. I slipped in two photographs (one on each side) and the added colored paper as the background. I poured fish tank gravel in (since that's all I could find at home) to weigh it down, added the red shreds on top of that and then filled the remainder of the space with chocolates. I stuck some airfilled balloons on a stick in the middle and a few oreo pops all around. If I had more time I would have tied a ribbon around the balloons sticks to complete the look. I forgot to take some good shots of the finished product, but I think you can see from these pics how they turned out.
  |

For the kids we got some buckets w/ shovels from Target ($1 bin) and foam animal shaped visors from Michaels (in the clearance bins) and left it on each table. There's a sand pit area on the playground so we thought it was fitting. I just wished we took pictures of the kids with their animal visors.

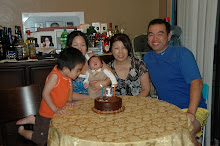
 And last but not least.....drum roll please..... the CAKE.
Our friend, who owns/runs Crazy Cake Company in Davis, CA, made this cake. She's a very creative and talented person so we left it in her hand to design the cake, and boy did she not disappoint us. It was so cute and cool that it seemed like a waste to cut it.
No comments:
Post a Comment